Database Migrations
Monarch schemas and tables updates are made with Alembic migrations. Follow these steps to generate migrations.
First Time Installation
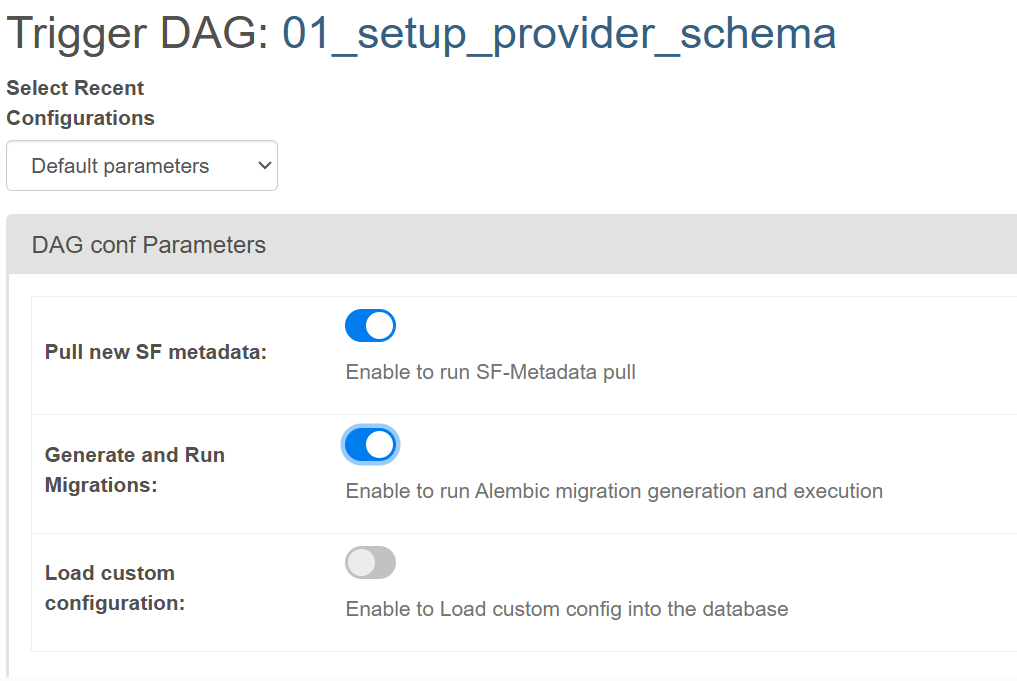
When you're setting up Monarch at the start of the project and you're about to run migrations for the first time, run DAG 01_setup_provider_schema with these two toggles set. It will go through the whole migration process including running existing migrations, fetching the object_meta.json from Salesforce, and generating and running new migrations.
First Time Installation (Local Instance)
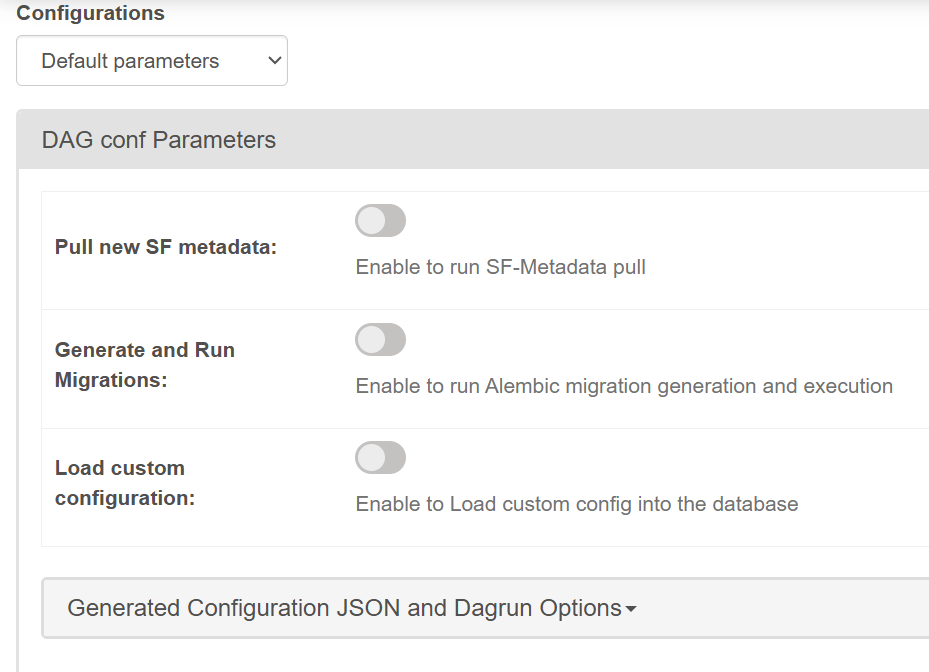
If someone else already ran the first time installation steps to generate migrations but you're setting up the project for the first time locally, you can run DAG 01_setup_provider_schema with everything disabled. This will just run those existing migrations.
Subsequent Migration Generation
DAG 01_setup_provider_schema is meant to be run only once for the initial setup. If you need to generate and run migrations after that, use the monarch endpoints to generate and run migrations.
Steps

- Before making any changes, be sure your own migrations are up to date. You can do this by hitting the
/run-migrationsendpoint. This step is important because someone else could've pushed changes, and if you don't apply them first then your files will contain the wrongdown_revisionversions. - Update the corresponding file for migration. This will either be
- The
object_meta.jsonfile pulled from Salesforce - The python file for the schema the table is in. For example, if you need to update or add a table in the
merge_utilities, make the changes insource-explorer/monarch_api/models/merge_utilities.py.
- The
- Hit the
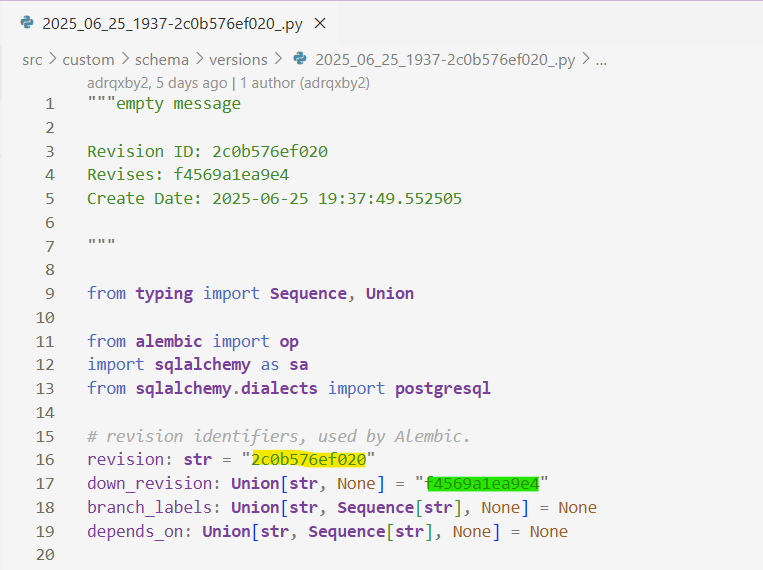
/generate-migrationsendpoint. This will generate migration files in thesrc/custom/schema/versions/directory (e.g.src/custom/schema/versions/2025_05_05_1515-8ae0a8ff3e29_.py). - Open that newly generated file and double check the updates in both the
upgradeanddowngradefunctions. Theupgradecommands are used to apply the new changes while thedowngradeones are used to revert them. Manually adjust them if necessary. - Once the version file has been updated, hit the
/run-migrationsendpoint and ensure your schemas and tables have been migrated as expected. - Commit both the schema python and Alembic version files to the repo.
Troubleshooting
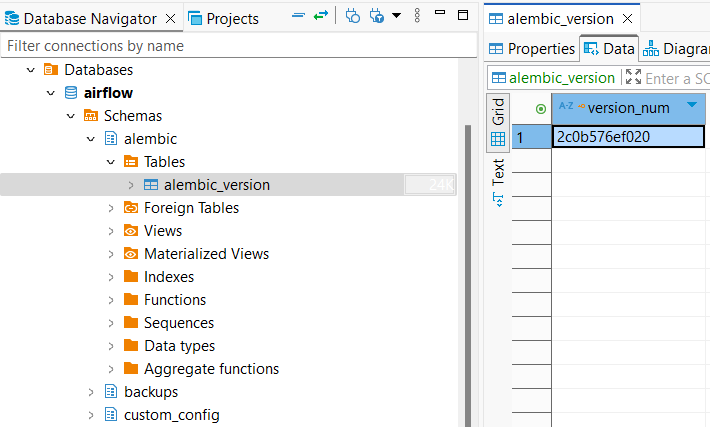
Sometimes running a migration doesn't appear to do anything. One sanity check is to ensure the alembic_version table in the alembic schema is on the correct version. Before running your migration, the version_num should be set to the value of the down_revision in your migration file. Afterwards it'll be updated to the value of revision.
Other Information
Migrations for the core Monarch schemas (e.g. landing, staging, utilities, etc.) are handled by Monarch Api. You can find the schema files in source-explorer/monarch_api/models. Be sure to make updates there if one of Monarch's core schemas needs to be updated.
Client-specific Migrations (e.g. to create tables and columns for specific objects and fields) are handled by the object_meta.json file, located at src/custom/schema.
Migration Generation - Future State
As we expand Monarch with the ability to handle multiple types of data models, managing migration versions in git will likely become more complicated and inconvenient. To avoid issues, we plan on moving in a new direction. Instead of committing Alembic migrations to git, only commit the schema-related files (i.e. monarch_api models or object_meta.json). This means that during development, each developer will generate and run migrations locally before their main development work. This will mitigate needing to reconcile upstream and downstream version files if multiple developers are actively updating the core Monarch schema.